
To close out January we are bringing back a COOK classic – select kitchen tricks from recent chefs. On a nightly basis I hear great cooking advice from the pros. I took some notes and followed up with the chefs in order to share those tips with you. Read on to learn what I heard and gain a few kitchen pointers!
Tip #1: The Oblique Cut
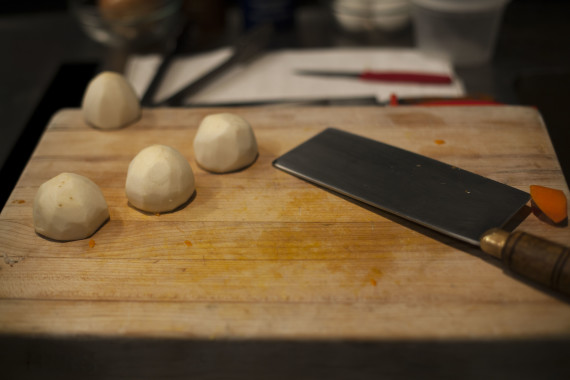
Also known as the “roll cut,” this knife technique allows you to quickly cut vegetables such as carrots and parsnips. Chef Scott Megill of Grace Winery demonstrated to the class how to use this efficient cutting method. He took his vegetable cleaver and made a 45 degree cut to produce a small piece. Then he rotated the parsnip 90 degrees and made another 45 degree cut, creating a similar small piece. After he repeated this process, in about a minute Scott had all of his parsnips and carrots roughly the same size. Scott explained that the oblique cut is a rustic but purposeful technique meant to cut vegetables quickly and provide maximum surface area for even roasting.
Tip #2: Flour Power

Jezabel Careaga is both a skilled baker and a smart entrepreneur. She owns and operates Jezabel’s Cafe and Jezabel’s Studio in Philadelphia. When it comes to sourcing cake and self-rising flour, Jezabel doesn’t buy from the grocery store; she makes them herself! During her Argentinian pastry class Jezabel shared her trick for making your own self-rising flour and cake flour. For self-rising flour, simply take 2 cups of all-purpose flour and add 1 tbs of baking soda. Cake flour is just as easy – take 1 cup of all-purpose flour, remove 2 Tbsp and replace with 2 Tbsp of cornstarch. Another quick baking tip from Jezabel is the perfect microwave time to melt butter, 12 seconds, no more no less!
Tip #3: Southern Eggs
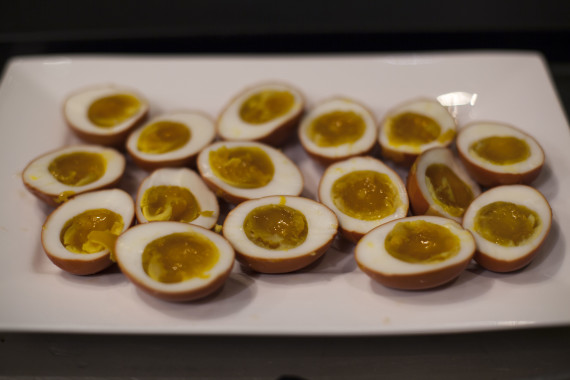
For his Southern-inspired ramen, Justin Swain of Rex 1516 had one of the most interesting brines I had ever seen. Justin took boiled eggs and let them sit overnight in a sweet tea brine of lemon, orange juice, orange rinds, salt and, of course, sweet tea. Justin told COOK guests that the sweet tea brine adds both color and a new dimension of flavor to the eggs. The sweet, herbal flavor of the eggs paired well with his salty, smoky ham hock ramen broth. He also showed off another useful kitchen trick: use the back of your knife to peel ginger!
Tip #4 Low-Sodium Chicken Brine
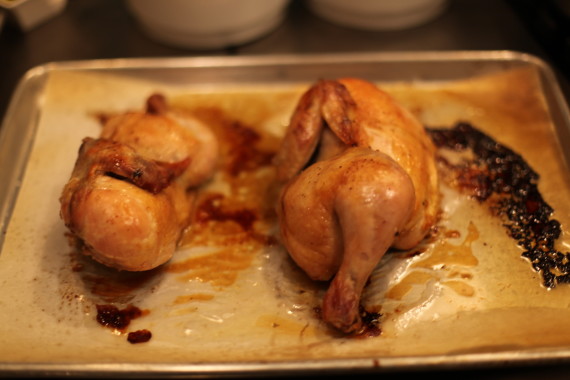
What came first the egg brine or the chicken brine? While I did see the egg brine before this chicken brine, I cannot answer the existential chicken/egg question. Michael Sultan and Carolyn Nguyen of Neshaminy Creek Brewing Co. did a beer pairing class at COOK where the duo prepared beer can chicken. Guests raved about how juicy and tender the chicken was so I asked them for the chicken brine recipe after class. For a 1 gallon brine take 1 cup of salt, 3/4 cup sugar and add to your chicken. Then heat 1 gallon of water and pour it over top of the sugar and salt covered chicken. This will evenly dissolve all the sugar and salt. Let the chicken sit in the brine for 2 days and you will have moist chicken every time!
Tip #5 Finger Rice

Robin Admana and Sandy Trinh of Foolish Waffles put on a Filipino and Vietnamese inspired brunch at COOK that rocked the house. One of the best courses of the meal was tocilog, a cured pork dish with eggs, garlic fried rice and garlic chips. While cooking this Filipino dish, Robin and Sandy imparted some Asian rice cooking wisdom on guests with a great little kitchen hack. When cooking rice, just use your finger to measure! First, level your rice in your pan. Then put your finger on top of the rice (not the bottom of the pan, but the top of the rice!) and fill the pan with water until it reaches the first line on your finger. Bring the water to a boil, cover and reduce to a simmer until the rice is cooked (about 18 minutes). No matter which finger you choose the measurement will be generally the same as the first line on all of your fingers is basically the same.
That’s it for now – get cooking and hope these tips come in handy!
Back to Blog

