Marisa McClellan of foodinjars.com taught a canning class at COOK last Sunday. That day, she shared 2 recipes with us (see below) and also gave us the scoop on her favorite canning tools: a lid wand, a jar lifter and a wide-mouth funnel. This got us over at COOK thinking that perhaps a Canning Tools-101 post could be beneficial to our COOKies.
Summer might be coming to a close but with a few weeks left of warm weather there is still time to preserve fresh vegetables and sweet fruits for colder dreary months. Canning may seem like your grandmother’s past time but with more CSAs and farmers markets popping up in the city; a younger generation is moving towards preserving. Cucumbers are made into pickles, berries into jams and a fall harvest of apples into sauces and butters for winter consumption. Lucky for you preserving is easier than ever.
Once you chose your fruit or vegetables you will need a few things to get the job done.
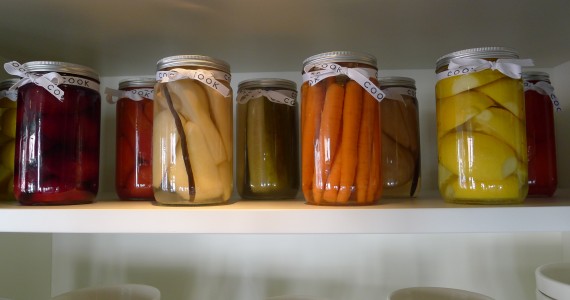
1. Jars.
Jars, such as those made by the Ball Corporation, are fairly standard and not too pricy. They normally come in a case, but sometimes can be bought individually. You can find them easily at retail stores like Walmart or Wegmans or online at the Ball Corporation’s own website, freshpreserving.com.
2. Tools.
A utensil set for preserving will make your life exponentially easier. This box of tools holds a funnel for easy filling, a bubble and headspace tool, a magnetic lid lifter and a jar lifter – so you don’t have to stare at the pot boiling water wondering how to remove the jars with your bare hands.
3. A pot, make that two.
For example: if you are making jam you will need a pot to cook your fruit in. Something with enough headspace to allow the jam to come to a rolling boil. Preferably it should be a non-reactive pot, this means stainless steel or enamel. However, I will admit to making many batches of jam in my non-stick stock pot and they came out delicious. You will also need a pot to process your jars in. The jars will need to be covered with at least 6 inches of water at a rolling boil, so If you don’t have something that is large enough it might be worth buying a waterbath canner.
A waterbath canner is usually around 21 quarts and does take up some kitchen space. But, you will be able to fit large and small jars for processing and can be used for a crab boil when you aren’t making jam. While this one is from the Ball website I bought mine at a hardware store and will admit it was the most expensive tool needed for canning. Some canners can cost $80-$100. The one above is $70 but also comes with the preserving tools.
If you have a pot at home that will work, you can use it! Place a round rack on the bottom as a barrier between pot and jars, or use a folded tea towel or washcloth. This will keep the jars from cracking from direct contact with a heat source.
And that’s it! The basic things needed for delicious jams or jellies, relishes or compotes. Of course there are plenty more things you could add, pectin for most jellies and jams, vintage jars for that extra special gift, cookbooks galore. Thanks to the Internet the first time canner has a wealth of recipes and suggestions at their fingertips.
The recipes below are courtesy of Marisa McClellan and the photos were taken during her class at COOK. For more great canning info from one of the best bloggers around, please visit Marisa’s blog, foodinjars.com. Additional useful info can be found at freshpreserving.com. Many thanks to Sofia Griebel for help with this post!
Happy canning!
RECIPES:
Lemony Pickled Cauliflower
makes 3 pints
- 1 head cauliflower, cut into small florets (1
- 1/2 to 2 pounds)
- 2 cups distilled white vinegar
- 3 tablespoons salt
- 1 lemon, sliced
- 1 1/2 teaspoons mustard seeds (1/2 teaspoon per jar)
- 1 1/2 teaspoons cumin seeds (1/2 teaspoon per jar)
- 3/4 teaspoon red chili flakes (1/4 teaspoon per jar)
- 3/4 teaspoon peppercorns (1/4 teaspoon per jar)
Place a lemon slice at the bottom of each jar and divide the mustard seed, cumin seed, red chili flakes, and peppercorns evenly among the jars.
Pack the cauliflower florets in jars as tightly as you can manage, but without mangling them. Pour brine slowly over cauliflower, leaving 1/2 inch headspace. Gently tap the jars on a towel-lined countertop to help loosen any bubbles before using a wooden chopstick to dislodge any remaining bubbles. Check the headspace again and add more brine if necessary. Top each jar with an additional slice of lemon. Wipe the rims, apply lids and rings and process in a hot water bath for 10 minutes. Let these pickles cure
for at least 1 week before eating.
Pear Vanilla Jam
makes 5 pints
- 5 pounds bartlett pears (approximately 8-10 cups of chopped fruit)
- 2 vanilla beans, split and scraped
- 4 cups sugar
- zest and juice of one lemon
In a large, heavy-bottomed pot, combine chopped pears, sugar and vanilla beans. Cook over medium heat until the fruit can easily be smashed with the back of a wooden spoon. Use a potato masher or immersion blender to break the fruit down into a mostly-smooth sauce (remove the vanilla bean solids before blending).
Add the pectin and bring to a rolling boil. Let boil for a full five minutes in order to active the pectin, so that the finished product will have a nice jammy consistency.
Fill jars, wipe rims to remove any residual jam, apply lids (heat canning lids in a small pot over very low heat while you’re preparing the jam to ensure a good seal) and screw on the rims.
Process the filled jars in a boiling water canner for 10 minutes (start the timer when the pot has returned to a boil). When the time has elapsed, remove jars from pot and place the jars on a towel-lined countertop. Let them cool undisturbed for at least two hours. During this time, the lids should seal. Check to ensure the jars have sealed by pushing down on the center of the lid. If it feels solid and doesn’t move, it is sealed.
Back to Blog

