‘Tis that time of the year when you stock your home full of sweets, secretly hoping you’ll be left with some for your own enjoyment. While stores promote the typical miniature sugar bombs everyone knows and loves, maybe you are a bit of a rebel. If living on the wild side is your thing, you should take a stab at making candy at home instead of splurging at your local convenience or big box store.
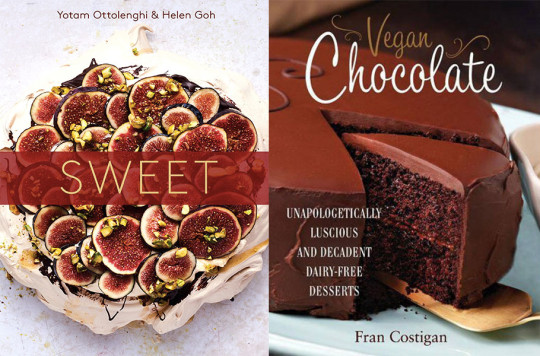
One of my favorite confections growing up was the caramel apples pops. They were the best. Caramel with apple-flavored hard candy, who could beat that? It was like a Werther’s and an apple Jolly Rancher in one, a win-win. When I came across this Raspberry Lollipop while perusing our cookbook collection, it immediately took me back to my childhood and standing in the corner store with two dollars in change looking to buy a handful of caramel apples. While these were inspired by Valentine’s Day, Yotam Ottolenghi writes in his dessert book Sweets, that they can be adapted to any occasion. You can either choose to shape them by hand or using a cake mold. Hopefully, trick-or-treaters will count this more as a treat than a trick.
Raspberry Lollipop
2/3 cup fresh raspberries
1 1/4 cups granulated sugar
3/4 cup light corn syrup
2 tablespoon plus 2 teaspoons water
2/3 oz freeze-dried raspberries
Line three baking sheets with parchment paper, then lay twelve lollipop sticks out flat on the line sheets – the lollipops are large so they require some space and set aside.
Process the fresh raspberries in the small bowl of a food processor, then strain through a fine-mesh sieve placed over a bowl; you should end up with about 2 tablespoons of seedless puree. Set aside.
Put the sugar and corn syrup into a medium saucepan and stir in the water. Place over medium heat and cook for about 3 minutes, stirring until the sugar melts. Increase the heat to medium-high and boil for about 10 minutes until it reaches 297 degrees Fahrenheit on a candy thermometer. Precision is key here, but it is better to be 1 degree hotter than 1 degree below. Remove from the heat and add the raspberry puree; take care here, as the sugar will be bubbling. Stir slowly and gently with a metal spoon until combined, taking care not to mix too quickly, as this will create air bubbles that will stay in the lollipops. Once fully combined, lightly stir in the whole and lightly crushed dried raspberries, again taking care as you do so. The caramel should have stopped bubbling by this time.
Immediately spoon 3 tablespoons of the mixture onto the top one-third of each of the lollipop sticks. Use the spoon to create a circle if shaping by hand. You’ll need to work fast here, as the sugar mixture will thicken quickly. Divide the freeze-dried raspberries equally around the lollipops. If you are using cake rings, place them over the top third of the lollipop sticks and pour in 3 tablespoons of the mixture
Loosely lay a sheet of parchment paper over the top of the lollipops to stop them from sweating. Set aside until completely cool and set; this should take about a half-hour. Once cool and set, remove the cake rings from the lollipops and serve.
What’s a holiday that centers around candy and sweets without chocolate? Did you know that pure chocolate is vegan? Forget the milk chocolate that we’re used to, I am talking the bittersweet stuff. With a growing number of families turning to plant-based diets, having multiple vegan options sounds like a good idea (NOTE: the lollipops are also vegan). In Vegan Chocolate, Fran Costigan shares with her recipe for truffle squares. Give yourself at least 12 hours before needing them because you’ll need to produce the major component, the basic cashew cream, and it will need to freeze after it’s made.
Bittersweet Cashew Cream Truffle Cream Squares
Makes 30-36
Basic Thick Cashew Cream:
5 ounces whole raw cashews, rinsed and soaked 3 to 4 hours
2/3 cup water, room temperature
1/4 cup agave syrup or pure maple syrup, grade B or dark amber
1 teaspoon vanilla extract
1/4 teaspoon guar gum
Drain the cashews in a strainer. Put the rinsed nuts into a blender and add the water, agave or maple syrup and vanilla. Blend, starting on low, and quickly increase the speed to high. Blend for about 1 minute until the cream is perfectly smooth.
Push any pieces of unblended cashews down into the cream and blend for 1 minute.
Add the guar gum directly into the cream, making sure it doesn’t land on the sides of the container. Blend on low for 30 seconds, then increase the speed to high and blend for 1 minute.
Truffles:
1 cup basic thick cashew cream
7 ounces dark chocolate (72-75%)
1 teaspoon vanilla extract
Dutch process cocoa powder or chopped nuts for coating
Pour the basic thick cashew cream in a small saucepan and set aside.
Chop or break the chocolate into pieces, then process in a food processor until powdered. Add the chocolate to the cashew cream and cook over very low heat, stirring slowly and constantly with a silicone spatula until the chocolate is about 2/3 melted, about 1 minute.
Immediately remove the saucepan from the heat and continue to stir gently until the chocolate is completely melted and the ganache is smooth. Stir the vanilla into the ganache.
Line an 8×8 pan with parchment paper large enough to hang over the sides. Spoon the ganache into the pan and smooth the top. (You want to make a block of ganache that is 1/2 to 1 inch thick). Refrigerate for 2 to 3 hours until firm and then transfer to the freezer. Freeze for 4 hours or overnight until quite firm. When the ganache is firm, lift the block onto a cutting board with the help of the parchment paper. Square the edges with a sharp knife and cut the block into squares. If the ganache gets soft, refrigerate until chilled. (if the ganache is too soft to cut, work with half or even a quarter of the block at a time, keeping the rest refrigerated).
Pour the cocoa powder into a fine-mesh strainer and lightly sift the cocoa powder over the truffle squares. (If the squares are very cold, the cocoa may not adhere. If that happens, allow them to soften slightly for a few minutes.) Sprinkle with chopped nuts or seeds of your choice if you like. You may also coat them in melted chocolate and cocoa powder, or enrobe in tempered chocolate. Place the finished truffles in the refrigerator to set for 30-45 minutes.
Be sure to visit your local craft store for cellophane and ribbon to wrap your treats for distribution. And stop by COOK for your own copy of the cookbooks referenced above!
Back to Blog

